Been feeling a little down lately about life, friendships in your 40’s, and kids acting all summer crazy, so I had a little therapy today…. any by therapy I mean I got a burr up my rear to go outside in the heat of the day and take care of some garden “projects” that have been piling up, mostly because I lack the effort to put into them and it’s full-blown “Summer in Texas” out there.
The heat and wacky weather have really taken a toll on my veggies, mostly the tomato plants but some of the others as well. Then the spider mites jumped on the bandwagon and I fought that losing battle for a while before I decided to just give up and pull the plants struggling and wait until cooler fall temps to replant a few of them. I have a few tomato plants I’m babying along until fall if I can, and quite a few pepper plants that have just now started somewhat producing.
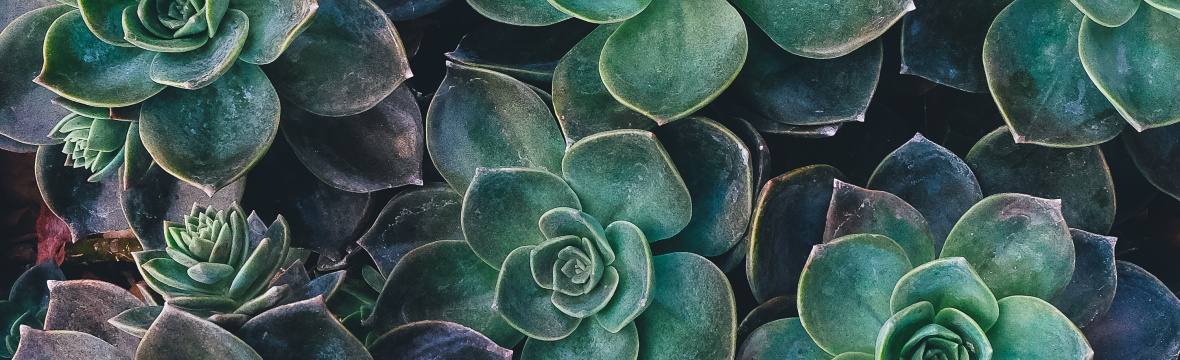
So out I went and spent 3-4 hours pulling stuff up, fixing beds, planting stuff I had that I kept thinking I should plant but never found time to do it… which led to putting together a new succulent hanging basket for the front, creating a trellis structure for my golden raspberries, a few other general garden/yard/patio clean ups, and then watering it all before collapsing inside like the limp sweaty noodle I was.
But…..
A “few” peppers and pollinator favorites:-)Plumeria “teens”, plus some herbs, peppers, and tomatoesMore Plumeria and SucculentsGone are the plant tents I had my squash and zucchini in to protect them from SVB, but I am still loving this bed and my “young adult” plumeria area!Up against the house for (not shown in this photo lol) added shade from the brutal afternoon sun.
I am SO PLEASED with my work, and even better, too tired to be feeling down and cranky. 🤣🤷♀️ we’re going to be headed to the beach fairly soon so I’m leaving the big bed the way it is, but I plan on converting it (half of it at least) to another Plumeria area for some of the older seedlings. I have several hundred more coming up in the lights inside, so fairly soon I’m going to have to think fast about a solution to keep all these seedlings from going dormant this winter!!! 😳😳 Accepting all thoughts, ideas, and suggestions…. 🤣🤷♀️🤦♀️
Note that some of the links below are affiliate links! I only recommend products and brands that I use and love, and that I think you would love as well! I earn a small commission on products purchased via these links, and appreciate your support of my blog! <3
So I’ve gotten way in to this gardening thing, and it’s been going really well! My newest project is starting plants indoors from seed, and I’ve been working on the setup required to do so! As of today I have three varieties of Cauliflower that have already germinated, and two varieties of Plumeria in the seed trays as well!
I started with these Burpee Seed Trays from Amazon, in both the 16ct and 8ct sizes. I originally got all 16ct but then I realized especially with the Plumeria, that I probably didn’t want to start 16 of the same variety at a time, and I didn’t want to combine different plants in the same tray as they’d probably grow at different rates and then the lighting would get all wonky, so back to the store for some smaller trays!
The potting medium I used was recommended to me by a class I took with The Dallas Garden (a GREAT follow if you’re not already doing so!), and so far I’m super happy with the results. It’s the Miracle-Gro Cactus and Palm Mix, which you can pick up readily at any Lowes, Home Depots, or local garden store!
I filled the seed pods with the soil mix, dampened with a bit of water, placed my seeds in each pod, then covered with Vermiculite – I filled the bottom watering trays about 1/4″ deep and put the seed pod tray inside, then placed them under these handy adjustable clip-on grow lights for 12 hours on / 12 hours off (helps that the lights have a timer ha ha ha) – and PRESTO, 4 days later I have 16+ Snow Crown Cauliflower, 8+ Flame Star Cauliflower, and 8+ Lavender Cauliflower seedlings emerging and looking awesome!
Lower the grow lights down to just above the seed pod trays for best results! Not like shown. LOL! I’ve adjusted those now!
If you look closely you can see the tiny seedlings emerging from under the Vermiculite!
This morning, and throughout the day, the seedlings are growing like crazy!!! I took an image this morning with the lights on, and then again this evening with the lights off, and they’ve grown at least 1/4-1/2″ throughout the day! I can’t believe how fast these things are taking off!
Monday 8/1/22 AMMonday 8/1/22 PMMonday 8/1/22 PM
To say I am excited is an understatement! I’ve also been doing a lot of research on growing Plumerias from seed – I’ve been growing Plumeria plants from cuttings for about 12-13 years now and had a TON of success, but I’d love to try getting some seedlings growing. I have a tray of 16 planted in seed cups/soil currently that are a white/yellow mix, and then another tray of 7 that are an orange/yellow mix. The interesting thing about Plumeria seeds is that they have completely different DNA from the parent plants, and so can be completely different colors from the mother from which the seed pod came! Germination can take anywhere from 7 days to 30 days, so it’ll be interesting to see if both the seeds from one of MY seed pods, and also the seeds I ordered on the internet germinate, and if they do, do they germinate at the same rate?
Mother Plant – My Seed Pod =)Mother Plant – Purchased Seeds
Meanwhile, just for grins, I decided to do another experiment with the plumeria seeds which I’ll probably try half/half purchased seeds and my own seeds using hydroponics to grow! I wasn’t quite ready to shell out the big bucks for an Aerogarden, so I did a little digging and found this less pricey option by iDOO.
I’ve seen other growers have great success using one of these, and it has a lot of nice features that I’m looking forward to seeing if they make a difference one way or another. If this works as well as I think it will, I’ll probably go ahead and get a couple more, because I plan on starting a LOT of Plumeria seeds.
That’s your garden update for now! Keep posted, because there should be a lot more updates coming soon as these babies start growing up and the Plumeria plants start sprouting! Happy gardening everyone!!
When there’s a spring storm coming and you spend a ridiculous amount of time and effort trying to protect the $20 worth of plants you just planted yesterday from the high winds…..
… and the storm just completely passes you by… 🤣🤣🤷♀️🤦♀️
For years I’ve toyed with the idea of “suburban farming” – growing my own produce in raised beds of some sort. I love spending time working with the decorative plants around my yard but just never got around to the whole vegetable/fruit part of the equation. There has always been some other pressing home improvement project that bumps the raised bed gardening down lower on the list and we just never really gave the idea much traction.
This spring I began mentioning it to the hubs again, and for some reason this time the idea took hold in his head (maybe it’s his growing love for a nice ripe tomato slice on his hamburgers? 🤣) This past weekend he built me a little prototype raised bed to see how I liked it based on some designs I sent him that I liked and a few other random ideas that popped into my head for maximizing the not-huge space we could allot to it.
We decided to level them out and step them down the fence line here to allow for easier netting should we need to keep the critters out. First things first, however, was fixing the mud pit that over half our backyard had become (it’s always something, isn’t it?)
We were supposed to be off work today to help with a fish survey in the neighborhood lakes, but due to circumstances beyond control those plans got scrapped and we decided to go ahead and get this huge project finished off. Two and a quarter pallets of St. Augustine sod, 28 thirty pound bags of beach “pebbles” (they’re ROCKS people, calling them pebbles doesn’t make them lighter), and a crapload of sweating, swearing, and me having to crawl under the trampoline several times later, we have a completed backyard project. It’s funny, I knew the muddy mess in the shaded areas under our huge bald cypress trees looked bad, but I didn’t realize exactly how bad until we got the sod and the dry creek bed done and it looked freaking amazing!!!
So I got to work hand-watering all that sod, and hubs set to work installing the bed and making sure it was completely level by digging out the ground underneath. When he got it level we placed some cut branches in the bottom to help with drainage (and also to cut down a little on the amount of soil we’d need to fill it) and filled it with good quality gardening soil. First one is in!!!
Box 1, Phase 1
We did some calculating and planning and decided on a total of 6 boxes for this first phase, 5 of which will be stepped down this fence line, and the other will be placed beside the kids’ playhouse cottage as the “Children’s Garden”. Of course I couldn’t wait to put some plants in this so I went out and bought way more than would fit and we probably can’t get the other five boxes made for 2+ weeks 🤦♀️🤷♀️🤣.
This box got three red beefsteak tomato plants with supports and I read on Pinterest that basil makes a good companion plant to tomatoes so I planted two of those in the front of the planter. Waiting on the sidelines now are one more tomato plant, four big Bertha green bell pepper plants, and two good-sized strawberry plants. Hopefully they’ll make it until we can get the additional boxes made, though I may put the other tomato plant in a large pot with a support and see how it does there. Why not experiment, AmIRight? 🤷♀️🤣
And of course, I had to go back and get a second sweet basil, because there MUST by symmetry or my brain will start screaming, so here I am at 10pm at night putting another plant in… 🤣🤦♀️😜
Ahhhhh, that’s better 🤣
I hope to catalog my “journey” here along with trials, successes, and failures to share with others who may be interested in growing some of their own produce in a smaller, more confined place. More power to the suburban farmer!! ❤️❤️❤️ Updates coming soon (and hopefully more frequently than I’ve been posting in the past 🤷♀️🤣)
I get motivated to complete projects in the strangest of ways. Really, my hubs decided it was time to get the driveway concrete replaced, and so the crew arrived this morning and started the daunting (and crazy noisy) task of ripping out the old one and hauling it away. We have a TON of driveway so this is a fairly large project.
I see all that crap getting torn out and for some reason it gets me excited and motivated to start a project I’ve been avoiding for a couple months now – my flower beds. A few months back I got randomly motivated and completed all the current beds in the backyard by ripping out the 10 years of mulch the previous owners left behind coated in weeds and replacing them with nice stone edging and river rock. I have potted plants and container gardens strategically placed throughout. We still have two beds yet to be made or in various stages of half-assed back there, but that’s a project for a different day.
I decided to go ahead and start the front bed, specifically the large cut in portion by our front door and in front of our living room windows. We get a lot of water there so we’re working on the drainage, and I decided to do a wavy rock garden with some of the river rock we had left from the backyard project. Keep in mind this 1.5 tons of rock is currently housed on the back of our 0.75 acre lot, they’re ripping up the driveway right beside where the rock is being stored, AND the bed I want to work on is in the front yard. I spent most of the morning stripping out all that nasty mulch and this scrubby little ground cover plant that never took off and HOLYCRAP was that a lot of material to rake up and shovel into bags.
Got that finished and laid down the weed cloth, then started putting the rocks in. I puzzled over how to move them basically around the house crossing basically 3 sides of a 0.75 acre square and settled on small buckets pulled by a utility wagon. Smart, yet stupid.
That’s a lot of rocks. A LOT OF ROCKS. I made trip after trip after trip, dumping and spreading my rocks, then heading back the long way around the house for more rocks. Halfway through I start muttering to myself, and 3/4 of the way through I’m downright flat out bitching to myself. “WHAT stupid moron decided that an effing rock garden in the front beds would look good? Eh, Jamie? Oh yeah, it was YOU, you crazy delirious heifer. WHAT WERE YOU THINKING”
Luckily we have no neighbors within earshot on all three sides of the house that I was traveling so there was no one around to pass judgement on my sanity. My hubby made some sort of comment and I responded with something about my soft squishy mom body. I’m not even sure now what I was talking about, pretty sure I was delirious.
My whole day in painful photos.
I FINALLY got it all done, after modifying my “design” a little on the fly to accommodate some issues I didn’t think through or map out before I started. I’m pretty happy with how it turned out, and VERY happy I probably won’t have to do this much work on the rest of the beds. (Not doing NEAR the rock work in those) – my current plans for this space call for some really large, low, round “dish” containers/pots to do some succulent container gardens in, a few small potted plants, and most likely a garden bench with flagstone stepping stones across to it.
What do you think? Do you love DIY garden or home projects! I’d love to see some of your work! Leave a comment and let me know what you’ve done!!!